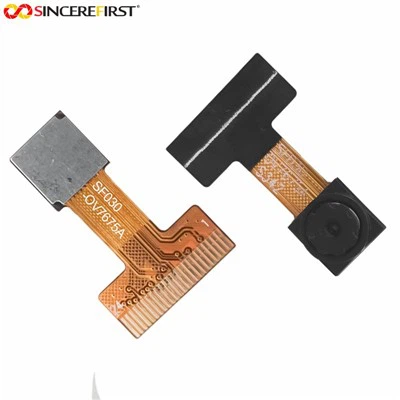
Exposure adjustment is a crucial aspect when working with the OV7725 Camera Module. As a trusted supplier of the OV7725 Camera Module, I understand the significance of achieving optimal exposure for high - quality imaging. In this blog, I will share some in - depth knowledge on how to adjust the exposure of the OV7725 Camera Module.
Understanding Exposure in the OV7725 Camera Module
Before delving into the adjustment methods, it's essential to understand what exposure means in the context of the OV7725 Camera Module. Exposure refers to the amount of light that reaches the image sensor of the camera module. A well - exposed image has the right balance of light and dark areas, allowing for clear details and accurate colors.
The OV7725 Camera Module uses a CMOS image sensor. The exposure is mainly determined by two factors: the shutter speed and the gain. The shutter speed controls the duration for which the sensor is exposed to light. A longer shutter speed means more light is captured, but it may also cause motion blur if the subject is moving. The gain, on the other hand, amplifies the electrical signal generated by the light hitting the sensor. Increasing the gain can brighten the image, but it may also introduce noise.


Manual vs. Automatic Exposure Adjustment
The OV7725 Camera Module supports both manual and automatic exposure adjustment modes.
Automatic Exposure Adjustment
The automatic exposure (AE) mode of the OV7725 Camera Module is designed to simplify the process of achieving proper exposure. In this mode, the camera module's built - in algorithm continuously analyzes the light conditions of the scene and adjusts the shutter speed and gain accordingly.
To enable the automatic exposure mode, you need to configure the relevant registers of the OV7725 Camera Module. The specific register addresses and values can be found in the OV7725 datasheet. Once enabled, the camera module will adapt to different lighting environments, such as bright sunlight or dim indoor lighting, without the need for manual intervention.
However, the automatic exposure mode may not always produce the desired results. In some complex lighting situations, such as backlighting or scenes with high - contrast areas, the automatic algorithm may struggle to find the optimal exposure. For example, in a backlit portrait, the automatic exposure may over - expose the background and underexpose the subject's face.
Manual Exposure Adjustment
Manual exposure adjustment gives you more control over the image quality. By manually setting the shutter speed and gain, you can achieve specific creative effects or overcome the limitations of the automatic mode.
To adjust the shutter speed manually, you need to write the appropriate values to the shutter control registers of the OV7725 Camera Module. A shorter shutter speed is suitable for fast - moving subjects or bright lighting conditions, while a longer shutter speed can be used for low - light situations or to create motion blur effects.
The gain adjustment is also done through register programming. When increasing the gain, you should be cautious as excessive gain can lead to a significant increase in noise. It's often a good idea to start with a low gain value and gradually increase it until the desired brightness is achieved.
Step - by - Step Guide to Manual Exposure Adjustment
Here is a step - by - step guide on how to manually adjust the exposure of the OV7725 Camera Module:
- Initialization: First, initialize the OV7725 Camera Module according to the datasheet. This includes setting up the communication interface (such as I2C) and configuring the basic parameters of the camera module.
- Disable Automatic Exposure: Locate the register that controls the automatic exposure function and set it to the appropriate value to disable it. This allows you to take full control of the exposure settings.
- Set the Shutter Speed: Determine the appropriate shutter speed based on the lighting conditions and the subject's movement. Write the corresponding value to the shutter control register. For example, in bright sunlight, a very short shutter speed (e.g., 1/1000s) may be sufficient, while in a dimly lit room, a longer shutter speed (e.g., 1/30s) may be required.
- Adjust the Gain: Start with a low gain value. Monitor the image quality on a display or through an image processing system. If the image is too dark, gradually increase the gain value until the desired brightness is achieved. Keep an eye on the noise level in the image. If the noise becomes too prominent, reduce the gain and try adjusting the shutter speed instead.
- Fine - Tuning: After setting the initial shutter speed and gain values, take a few test shots. Analyze the images and make further adjustments to the shutter speed and gain if necessary. Pay attention to details such as the sharpness of the image, the accuracy of colors, and the presence of noise.
Tools and Resources for Exposure Adjustment
To assist you in the exposure adjustment process, there are several tools and resources available.
The OV7725 datasheet is the most important resource. It provides detailed information about the camera module's registers, functions, and electrical characteristics. You can refer to the datasheet to understand how to configure the registers for exposure adjustment.
In addition, there are various development boards and software libraries that support the OV7725 Camera Module. These tools can simplify the programming process and allow you to quickly implement exposure adjustment algorithms. Some development boards even provide graphical user interfaces (GUIs) that make it easier to visualize and adjust the exposure settings.
Related Products
If you are interested in other camera modules, we also offer a wide range of related products. For example, the 8mp External Trigger Webcam Android Waterproof Inspection USB2.0 Camera Module is suitable for applications that require high - resolution imaging and external trigger functionality. The Night Vision VGA Omnivision Ov7720 CSI High Speed Usb2.0 Camera Module is designed for low - light environments with its night vision capabilities. And of course, our 0.3MP OV7725 VGA Sensor USB Camera Module offers a cost - effective solution for various imaging applications.
Conclusion
Adjusting the exposure of the OV7725 Camera Module is a combination of understanding the technical principles and practical experimentation. Whether you choose the automatic or manual mode, the goal is to achieve high - quality images with proper exposure.
If you have any questions about the OV7725 Camera Module or need further assistance with exposure adjustment, feel free to contact us for procurement and in - depth discussions. We are committed to providing you with the best products and technical support.
References
- OV7725 Datasheet
- Camera Module Application Notes