Hey there! I'm a supplier of USB 2.0 camera modules, and today I wanna share with you how to control a USB 2.0 camera module remotely. It's a topic that's super relevant, especially when you need to access your camera from afar. Whether it's for security, surveillance, or just some cool DIY projects, remote control of these camera modules can be a game - changer.
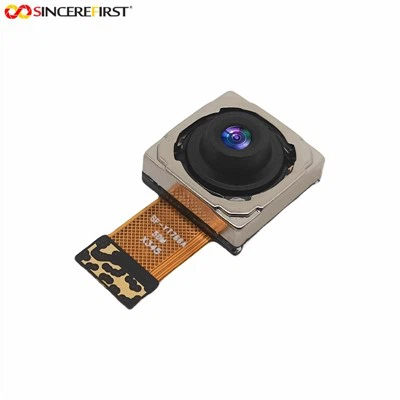
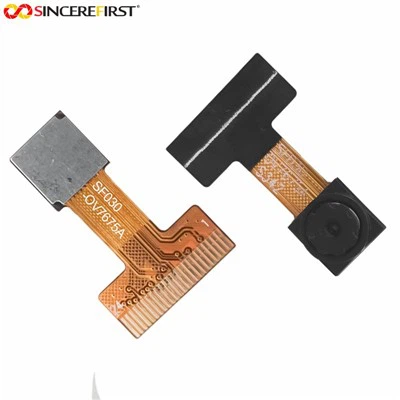
First things first, let's talk about what a USB 2.0 camera module is. It's a small, handy device that can capture images and videos. It connects to your computer or other devices via a USB 2.0 port, offering decent data transfer speeds for most applications. We offer a variety of these modules, like the Micro USB Inspection Camera Module 2.0 For Android, the 1080P Sensor TypeC UVC PCB Board Camera Module, and the IMX179 8MP USB Camera Module. Each has its own unique features and is suitable for different scenarios.
Now, let's dive into the methods of remote control.
Using a Network - Based Approach
One of the most common ways to control a USB 2.0 camera module remotely is through a network. You can set up your camera on a local network and then access it from outside that network.
Step 1: Connect the Camera to a Device on the Local Network
First, plug your USB 2.0 camera module into a computer or a single - board computer like a Raspberry Pi. Make sure the device has a network connection, either Wi - Fi or Ethernet. Once connected, install the necessary drivers for the camera module. Most of our camera modules are plug - and - play, but sometimes you might need to download specific drivers from our website to ensure full functionality.
Step 2: Set Up a Server
On the device where the camera is connected, you'll need to set up a server. For example, if you're using a Raspberry Pi, you can use software like Motion or MJPG - Streamer. These are open - source programs that can turn your device into a video streaming server. They'll capture the video from the camera and make it available over the network.
Step 3: Port Forwarding
To access the camera from outside the local network, you'll need to do port forwarding on your router. Find out which port your server is using (usually, it's a high - numbered port like 8080 or 8081). Then, log in to your router's settings and set up port forwarding rules. This will allow incoming traffic from the internet to reach your camera server on the local network.
Step 4: Access the Camera Remotely
Once port forwarding is set up, you can access the camera from any device with an internet connection. Just open a web browser and enter the public IP address of your router followed by the port number. For example, if your public IP is 123.45.67.89 and your server is using port 8080, you'd enter http://123.45.67.89:8080 in your browser.
Using a Cloud - Based Service
Another option is to use a cloud - based service. There are several companies that offer cloud platforms for remote camera control.
Step 1: Choose a Cloud Service
Research and choose a cloud service that suits your needs. Some popular ones include Amazon Web Services (AWS), Google Cloud Platform, and Microsoft Azure. These platforms offer a range of features, like storage, analytics, and security.
Step 2: Connect the Camera to the Cloud
You'll need to install software on the device connected to the camera that can send the camera's data to the cloud service. This might involve using an SDK (Software Development Kit) provided by the cloud service. The SDK will handle tasks like authentication, data encryption, and data transfer.
Step 3: Set Up Access Controls
On the cloud platform, set up access controls so that only authorized users can view and control the camera. You can create user accounts, set permissions, and even use multi - factor authentication for added security.
Step 4: Access the Camera Remotely
Once everything is set up, you can use a web - based interface or a mobile app provided by the cloud service to access the camera from anywhere in the world.
Considerations for Remote Control
When you're controlling a USB 2.0 camera module remotely, there are a few things to keep in mind:
Security
Security is crucial. Make sure to use strong passwords for all your devices and accounts. Encrypt the data being transferred between the camera and the remote device. If you're using port forwarding, be careful not to expose unnecessary ports to the internet, as this can increase the risk of a security breach.
Bandwidth
USB 2.0 camera modules can generate a fair amount of data, especially if you're streaming high - resolution video. Make sure your network has enough bandwidth to handle the video stream. If you're using a cloud - based service, check the data transfer limits and costs associated with the service.
Latency
There might be some latency when controlling the camera remotely, especially if there's a long distance between the camera and the remote device. This can be a problem if you need real - time control, like in a surveillance scenario where you need to quickly respond to an event.


If you're interested in our USB 2.0 camera modules and want to learn more about remote control or have any questions about purchasing, feel free to reach out to us. We're here to help you find the best solution for your needs. Whether you're a hobbyist, a business owner, or a developer, our camera modules can be a great addition to your projects.
References
- Motion software documentation
- MJPG - Streamer official website
- Amazon Web Services official documentation
- Google Cloud Platform official documentation
- Microsoft Azure official documentation