Time-lapse photography is a captivating technique that condenses hours, days, or even months of real-time events into a short video sequence. It can reveal the beauty of nature, construction progress, or the movement of the stars, providing a unique perspective that the naked eye might miss. The OV7725 Camera Module is an excellent tool for this purpose, offering high - resolution imaging capabilities and flexibility. As a supplier of the OV7725 Camera Module, I'm excited to share how you can use this module for time - lapse photography.
1. Understanding the OV7725 Camera Module
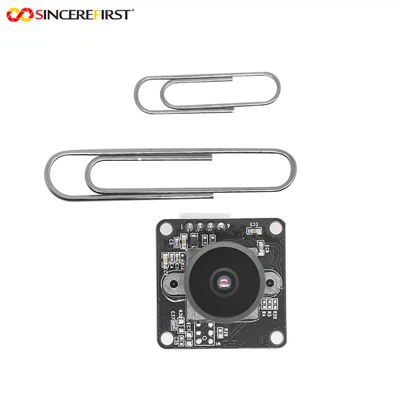
The OV7725 Camera Module is a high - performance, cost - effective solution for imaging applications. It features a 1/4 - inch VGA (640x480) CMOS image sensor, which can capture sharp and clear images. The module has a high frame rate, low power consumption, and a compact size, making it suitable for various applications, including time - lapse photography.
2. Setting Up the Hardware
To start using the OV7725 Camera Module for time - lapse photography, you first need to set up the hardware. You will need the following components:
- OV7725 Camera Module
- A microcontroller board (such as Arduino, Raspberry Pi)
- Power supply
- SD card module (if you want to store the captured images)
Connecting the OV7725 to the Microcontroller
Connect the OV7725 Camera Module to the microcontroller according to the module's datasheet. Generally, you need to connect the power lines (VCC, GND), the I2C communication lines (SDA, SCL), and the data lines (usually D0 - D7). For example, if you are using an Arduino board, you can refer to the specific pin connections provided in the OV7725's documentation.
Power Supply
Ensure that the OV7725 Camera Module is powered correctly. The module usually requires a stable power supply within a specific voltage range. Check the datasheet for the exact voltage requirements and use a suitable power source, such as a battery or a regulated power supply.
SD Card Module
If you want to store the captured images on an SD card, connect the SD card module to the microcontroller. This will allow you to save the images without relying on the microcontroller's internal memory.
3. Programming the Microcontroller
The next step is to program the microcontroller to control the OV7725 Camera Module for time - lapse photography. The programming language and the specific code will depend on the microcontroller you are using.
Using Arduino
If you are using an Arduino board, you can use the Arduino IDE to write the code. Here is a basic overview of the steps:
- Include Libraries: Include the necessary libraries for the OV7725 Camera Module and the SD card module.
- Initialize the Camera and SD Card: Initialize the OV7725 Camera Module and the SD card module in the
setup()function. - Set the Time Interval: Decide on the time interval between each photo capture. For example, if you want to capture a photo every 5 minutes, you need to set the appropriate delay in the code.
- Capture and Save Images: In the
loop()function, continuously capture images using the OV7725 Camera Module and save them to the SD card.
Here is a simple example code:
#include <Wire.h>
#include <OV7725Camera.h>
#include <SD.h>
#include <SPI.h>

// Define pins
#define SD_CS_PIN 10

OV7725Camera camera;

void setup() {
  Serial.begin(9600);

  // Initialize the camera
  camera.begin();

  // Initialize the SD card
  if (!SD.begin(SD_CS_PIN)) {
    Serial.println("SD card initialization failed!");
    return;
  }
}

void loop() {
  // Capture an image
  camera.captureImage();

  // Save the image to the SD card
  File imgFile = SD.open("image.jpg", FILE_WRITE);
  if (imgFile) {
    imgFile.write(camera.getImageBuffer(), camera.getImageSize());
    imgFile.close();
    Serial.println("Image saved successfully.");
  } else {
    Serial.println("Error opening file for writing.");
  }

  // Wait for the next capture
  delay(300000); // 5 minutes
}
Using Raspberry Pi
If you choose a Raspberry Pi, you can use Python to write the code. The Raspberry Pi has a more powerful operating system and can handle more complex tasks. You can use the picamera library to control the OV7725 Camera Module (after proper configuration).
import time
import picamera

# Set up the camera
camera = picamera.PiCamera()

try:
    while True:
        # Capture an image
        timestamp = time.strftime("%Y%m%d-%H%M%S")
        camera.capture(f'{timestamp}.jpg')
        print(f'Image {timestamp}.jpg captured.')

        # Wait for the next capture
        time.sleep(300) # 5 minutes
finally:
    camera.close()
4. Adjusting the Camera Settings
To get the best results in time - lapse photography, you need to adjust the camera settings according to your shooting environment.
Exposure
The exposure setting determines how bright or dark the image will be. In time - lapse photography, the lighting conditions may change over time. You can set the camera to automatic exposure mode initially, but for more precise control, you may want to switch to manual exposure mode and adjust the shutter speed, aperture, and ISO settings.
Focus
Ensure that the OV7725 Camera Module is properly focused on the subject. You can use the manual focus feature of the module to adjust the focus distance.
White Balance
White balance is important for accurate color reproduction. You can set the white balance to automatic mode or choose a specific white balance preset, such as daylight, cloudy, or tungsten, depending on the lighting conditions.
5. Post - Processing
After capturing a series of images, you can use post - processing software to convert them into a time - lapse video. There are many software options available, such as Adobe Premiere Pro, DaVinci Resolve, or even free software like OpenShot.
- Import the Images: Import all the captured images into the video editing software.
- Set the Frame Rate: Decide on the frame rate of the final video. A common frame rate for time - lapse videos is 24 or 30 frames per second.
- Export the Video: Once you are satisfied with the settings, export the video in the desired format.
6. Other Camera Modules We Offer
In addition to the OV7725 Camera Module, we also offer a range of other high - quality camera modules. For example, the OV5640 5MP Fixed Focus USB Camera Module provides a higher resolution of 5 megapixels, which is suitable for applications that require more detailed images. The 2mp Camera Module is a cost - effective option for basic imaging needs. And the Low Cost 4MP CMOS Infrared Image Sensor USB Inspection Camera Module For Android is ideal for inspection applications in low - light or infrared environments.


7. Contact Us for Purchase and Consultation
If you are interested in purchasing the OV7725 Camera Module or any of our other camera modules, or if you have any questions about time - lapse photography or camera module applications, please feel free to contact us. We have a professional team ready to provide you with detailed product information, technical support, and customized solutions.
References
- OV7725 Camera Module Datasheet
- Arduino Documentation
- Raspberry Pi Documentation
- Adobe Premiere Pro User Guide
- DaVinci Resolve User Manual
- OpenShot User Documentation