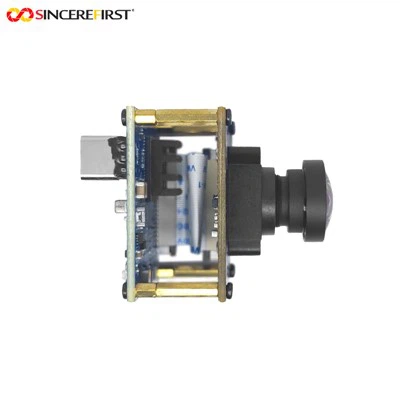
As a supplier of 16mp camera modules, I understand the importance of keeping these high - resolution devices in top - notch condition. A clean camera module not only ensures sharp and clear images but also extends the lifespan of the equipment. In this blog, I'll share some professional tips on how to clean a 16mp camera module effectively.
Why Cleaning is Necessary
Before delving into the cleaning process, it's crucial to understand why cleaning a 16mp camera module matters. Dust, fingerprints, and other contaminants can accumulate on the lens surface and other components of the camera module over time. These particles can scatter light and cause image degradation, such as reduced contrast, blurry spots, or color inaccuracies. Moreover, if left uncleaned, dirt can potentially damage the delicate internal parts of the module.
Pre - cleaning Preparations
- Gather the Right Tools: You'll need a few essential tools for cleaning a 16mp camera module. These include a microfiber cloth, which is gentle on the lens and won't scratch the surface; a can of compressed air to blow away loose dust particles; a lens cleaning solution specifically designed for camera lenses; and in some cases, a soft - bristled brush for hard - to - reach areas.
- Create a Clean Workspace: Choose a well - lit, clean area to perform the cleaning. A table covered with a clean cloth or towel can prevent the camera module from getting scratched while you work. Make sure the environment is free from excessive dust or drafts that could re - contaminate the module during cleaning.
Cleaning the Exterior
- Using Compressed Air: Start by using the can of compressed air. Hold the can upright and keep the nozzle a few centimeters away from the camera module. Give short bursts of air to blow away any loose dust or debris from the exterior of the module, including the sides and the lens housing. Be careful not to hold the can too close as it can potentially damage the components with the force of the air.
- Wiping with a Microfiber Cloth: Dampen a corner of the microfiber cloth with a small amount of lens cleaning solution. Gently wipe the exterior surfaces of the camera module, including the lens. Use a circular motion to ensure thorough cleaning. Avoid applying too much pressure, as this could damage the lens coating. If there are stubborn fingerprints or smudges, you may need to repeat the process a few times.
Cleaning the Lens
- Inspecting the Lens: First, carefully examine the lens for any visible dirt or debris. If there are large particles on the lens, use the compressed air to blow them off before proceeding.
- Applying the Cleaning Solution: Put a small drop of lens cleaning solution on the center of the microfiber cloth. Do not apply the solution directly to the lens, as it can seep into the module and cause damage.
- Cleaning the Lens Surface: Gently place the cloth on the lens and start from the center, moving outward in a spiral motion. This helps to prevent scratches and ensures that all parts of the lens are cleaned evenly. If there are persistent spots, you can use a bit more pressure, but always be extremely gentle.
Cleaning the Housing and Internal Components (Optional)
If you suspect there is dust or debris inside the camera module housing, and you're experienced and confident in opening it, you can proceed with the following steps:
- Opening the Housing: Use the appropriate tools, such as small screwdrivers, to carefully open the camera module housing. Keep track of all the screws and parts to ensure you can reassemble the module correctly.
- Cleaning Internal Components: Use the compressed air to blow away dust from internal parts like the circuit board and the sensor. You can also use the soft - bristled brush to gently remove any stubborn debris. However, be extremely careful not to touch the sensor directly, as it is very sensitive and can be easily damaged.
- Reassembling the Module: Once you're satisfied with the cleaning, carefully reassemble the camera module. Make sure all the parts are properly aligned and the screws are tightened securely.
Post - cleaning Checks
- Functionality Test: After cleaning, it's important to test the camera module to ensure it's working properly. Connect it to a compatible device and take a few test shots. Check the images for any signs of remaining dirt or damage, such as blurry areas or color irregularities.
- Storage: If you're not going to use the camera module immediately, store it in a clean, dry, and dust - free environment. You can use a camera case or a protective bag to prevent further contamination.
Our Product Range
As a leading supplier of camera modules, we offer a wide variety of high - quality products. For example, our 1/2.7 - inch PS5268L Sensor USB Camera Module is a great choice for applications that require high - resolution imaging. It features advanced sensor technology and excellent image quality.
If you're looking for a camera module with a different resolution and functionality, our 2MP OV2312 Color Global Shutter Camera Module provides a unique solution with its global shutter feature, which is ideal for capturing fast - moving objects without distortion.
And for applications where monochrome imaging is sufficient, our 1mp Omnivision OV9281 Sensor Mono Global Shutter Mini USB Camera Module offers a compact and efficient option.
Contact Us for Procurement
If you're interested in purchasing our 16mp camera modules or any other products in our range, we're here to assist you. Our team of experts can provide you with detailed product information, technical support, and competitive pricing. Whether you're a small business or a large corporation, we can meet your camera module needs. Don't hesitate to contact us to start a procurement discussion and find the perfect camera solution for your project.


References
- Camera Module Maintenance Handbook, Industry Standard Publications
- Best Practices for Cleaning High - Resolution Camera Lenses, Professional Photography Association