Traffic monitoring is a crucial aspect of modern urban infrastructure, ensuring the safety and efficiency of transportation systems. With the advancement of technology, the Raspberry Pi camera has emerged as a cost - effective and versatile tool for traffic monitoring applications. As a Camera Raspberry PI supplier, I am excited to share with you how to effectively use the Raspberry Pi camera for traffic monitoring.
1. Understanding the Raspberry Pi Camera
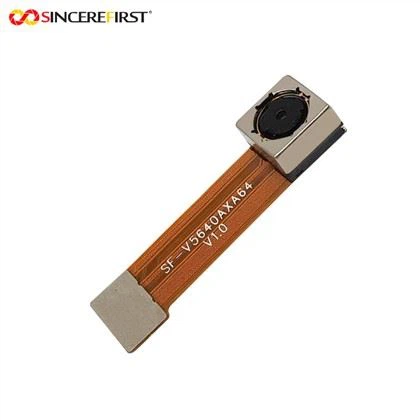
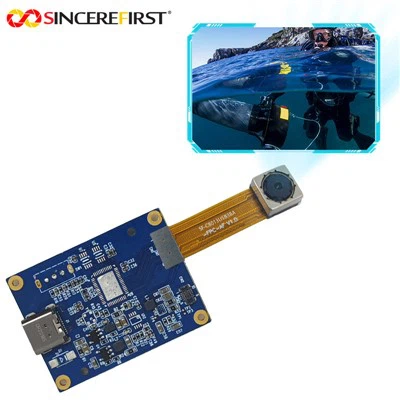
The Raspberry Pi camera is a compact and high - performance camera module designed to work seamlessly with the Raspberry Pi single - board computer. There are various models available, each offering different features and capabilities. For example, the Arducam 8mp Autofocus provides autofocus functionality, which is useful for capturing clear images of traffic at different distances. The 12MP IMX708 Raspberry Pi Camera Module offers high - resolution imaging, enabling detailed traffic analysis.
2. Hardware Setup
2.1 Selecting the Right Components
First, you need to choose the appropriate Raspberry Pi board and camera module. The Raspberry Pi 4 is a popular choice due to its powerful processing capabilities, which can handle the computational demands of traffic monitoring tasks. Along with the camera module, you will also need a power supply, an SD card with the operating system installed (such as Raspbian), and a case to protect your hardware.
2.2 Connecting the Camera
Connecting the Raspberry Pi camera is relatively straightforward. Locate the camera connector on the Raspberry Pi board. Gently lift the plastic tabs on the connector, insert the camera ribbon cable with the metal contacts facing the correct direction (usually towards the HDMI port), and then press the tabs back down to secure the cable.
3. Software Installation and Configuration
3.1 Operating System Installation
Insert the SD card with the pre - installed Raspbian operating system into the Raspberry Pi. Power on the device and follow the initial setup wizard to configure the basic settings such as language, keyboard layout, and Wi - Fi connection.
3.2 Enabling the Camera Interface
Once the Raspberry Pi is set up, you need to enable the camera interface. Open the terminal and type the following command:
sudo raspi - config
In the configuration menu, navigate to the "Interfacing Options" and select "Camera". Enable the camera and then exit the configuration tool. Reboot the Raspberry Pi for the changes to take effect.
3.3 Installing Necessary Libraries
To perform traffic monitoring, you will need to install some Python libraries. Open the terminal and use the following commands to install OpenCV, a popular computer vision library:
sudo apt - get update
sudo apt - get install python3 - opencv
OpenCV provides a wide range of functions for image processing and object detection, which are essential for traffic monitoring.
4. Traffic Monitoring Techniques
4.1 Vehicle Detection
One of the primary tasks in traffic monitoring is vehicle detection. You can use OpenCV's Haar cascades or more advanced deep - learning - based object detection methods. Haar cascades are pre - trained classifiers that can quickly detect objects such as cars, trucks, and buses in the camera images. Here is a simple Python code example for vehicle detection using Haar cascades:
import cv2

# Load the pre - trained vehicle classifier
vehicle_cascade = cv2.CascadeClassifier('haarcascade_car.xml')

# Open the camera
cap = cv2.VideoCapture(0)

while True:
    ret, frame = cap.read()
    if not ret:
        break
    gray = cv2.cvtColor(frame, cv2.COLOR_BGR2GRAY)
    vehicles = vehicle_cascade.detectMultiScale(gray, 1.1, 3)
    for (x, y, w, h) in vehicles:
        cv2.rectangle(frame, (x, y), (x + w, y + h), (0, 255, 0), 2)
    cv2.imshow('Traffic Monitoring', frame)
    if cv2.waitKey(1) & 0xFF == ord('q'):
        break

cap.release()
cv2.destroyAllWindows()
4.2 Traffic Flow Analysis
In addition to vehicle detection, you can also analyze traffic flow. By tracking the movement of vehicles over time, you can calculate parameters such as vehicle speed, traffic density, and the average time between vehicles. This can be achieved by using techniques such as optical flow, which estimates the motion of objects in consecutive frames.
5. Mounting and Placement
The proper mounting and placement of the Raspberry Pi camera are crucial for accurate traffic monitoring. The camera should be mounted at a suitable height and angle to cover the desired traffic area. It is recommended to mount the camera on a stable structure, such as a pole or a wall, to avoid vibrations that can affect image quality. Additionally, consider the lighting conditions. Avoid direct sunlight, which can cause overexposure, and ensure that the camera has sufficient illumination during low - light conditions.
6. Connectivity and Data Storage
6.1 Connectivity
The Raspberry Pi can be connected to the network via Ethernet or Wi - Fi. This allows you to remotely access the camera feed and monitor traffic in real - time. You can also set up the Raspberry Pi to send alerts or data to a central server for further analysis.


6.2 Data Storage
To store the traffic data captured by the camera, you can use an external hard drive or a cloud storage service. The data can include images, videos, and traffic analysis results. Regularly backing up the data is important to prevent loss.
7. Maintenance and Troubleshooting
7.1 Maintenance
Regularly clean the camera lens to ensure clear image capture. Check the power supply and connections to make sure they are stable. Update the operating system and software libraries periodically to benefit from the latest features and security patches.
7.2 Troubleshooting
If you encounter issues such as no image output, check the camera connection and make sure the camera interface is enabled. If the image quality is poor, adjust the camera settings such as brightness, contrast, and focus.
Conclusion
The Raspberry Pi camera offers a practical and cost - effective solution for traffic monitoring. By following the steps outlined in this blog, you can effectively set up and use the Raspberry Pi camera for traffic monitoring tasks. Whether you are a traffic management agency, a research institution, or an individual interested in traffic analysis, the Raspberry Pi camera can provide valuable insights into traffic patterns.
If you are interested in purchasing Camera Raspberry PI products for your traffic monitoring projects, we welcome you to contact us for further discussion. We can offer you a wide range of high - quality camera modules, including the Arducam 8mp Autofocus, 12MP IMX708 Raspberry Pi Camera Module, and more. For more information about our camera modules, please visit Camera Module in Raspberry PI. Let's work together to build a smarter traffic monitoring system.
References
- OpenCV Documentation
- Raspberry Pi Foundation Official Documentation
- Research papers on traffic monitoring and computer vision applications