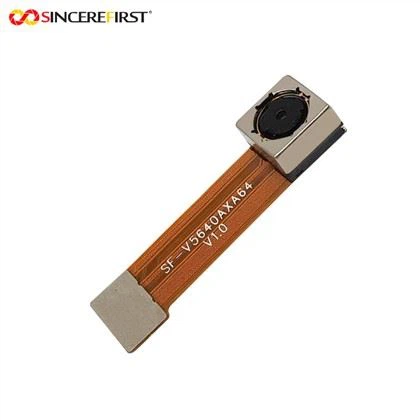
As a supplier of the Imx258 Camera Module, I'm excited to share a comprehensive guide on how to install this high - performance camera module. The Imx258 Camera Module is known for its excellent image quality, high resolution, and reliable performance, making it a popular choice for various applications, including machine vision, surveillance, and industrial inspection.
Prerequisites
Before you start the installation process, there are a few things you need to have on hand. First, make sure you have the Imx258 Camera Module itself. Additionally, you'll need a compatible device that can support the camera module. This could be a single - board computer like a Raspberry Pi, an industrial PC, or a custom - designed development board.
You'll also need some basic tools such as a small Phillips - head screwdriver, anti - static gloves to prevent electrostatic discharge from damaging the sensitive components of the camera module, and a clean, well - lit workspace.
Step 1: Prepare the Installation Environment
The first step in installing the Imx258 Camera Module is to create a proper installation environment. Put on your anti - static gloves to protect the camera module from electrostatic discharge. Place the device where you'll be installing the camera module on a stable surface. Make sure the power to the device is turned off to avoid any electrical hazards during the installation process.
Step 2: Identify the Camera Interface
The Imx258 Camera Module typically uses a specific interface to connect to the host device. Common interfaces include MIPI CSI (Mobile Industry Processor Interface Camera Serial Interface) for high - speed data transfer, or USB for more general - purpose connectivity.
If your device has a MIPI CSI interface, locate the MIPI CSI connector on the device. It's usually a small, flat connector with a locking mechanism. If you're using a USB interface, find an available USB port on your device.
Step 3: Connect the Camera Module
MIPI CSI Connection
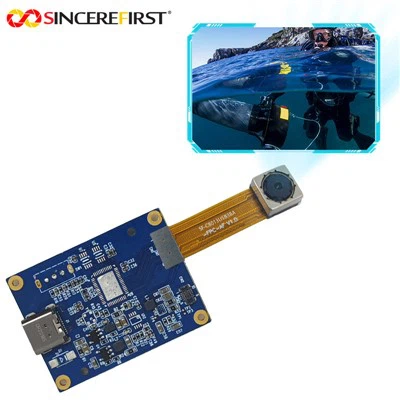
If you're using a MIPI CSI connection, carefully remove the protective cover from the MIPI CSI connector on the host device. Then, take the Imx258 Camera Module and align the flexible flat cable (FFC) of the camera module with the MIPI CSI connector on the device. Make sure the cable is inserted straight and fully into the connector. Once the cable is in place, gently lock the connector to secure the cable.
USB Connection
For a USB connection, simply plug the USB cable of the Imx258 Camera Module into an available USB port on your device. Make sure the connection is firm to ensure stable data transfer.
Step 4: Secure the Camera Module
After connecting the camera module, you may need to secure it in place. Some camera modules come with mounting holes that allow you to attach them to a specific location on the device or a mounting bracket. Use the small Phillips - head screwdriver to insert the screws through the mounting holes of the camera module and into the corresponding holes on the device or bracket. Tighten the screws gently to avoid over - tightening and damaging the camera module.
Step 5: Power On and Test
Once the camera module is securely connected and installed, it's time to power on the device. Turn on the power and wait for the device to boot up.
If you're using an operating system like Linux on a Raspberry Pi, you may need to configure the system to recognize the camera module. You can do this by accessing the camera settings in the system configuration menu. On other devices, the operating system may automatically detect the camera module and install the necessary drivers.
To test the camera module, you can use software applications that are designed to capture and display images or videos from the camera. For example, on a Raspberry Pi, you can use the raspistill or raspivid commands in the terminal to take a still photo or record a video.


Troubleshooting
If you encounter any issues during the installation or testing process, here are some common problems and solutions:
Camera Not Detected
- Check the Connection: Make sure the camera module is properly connected to the device. If it's a MIPI CSI connection, ensure the cable is inserted correctly and locked. For a USB connection, try plugging the cable into a different USB port.
- Driver Installation: Check if the necessary drivers are installed on the device. Some operating systems may require you to manually install the camera drivers.
- Hardware Compatibility: Ensure that the device you're using is compatible with the Imx258 Camera Module.
Poor Image Quality
- Lens Focus: If the image is blurry, the lens of the camera module may need to be focused. Some camera modules have a manual focus adjustment mechanism. Use a small tool to adjust the focus until the image is clear.
- Lighting Conditions: Check the lighting conditions in the environment. Poor lighting can result in low - quality images. Try adjusting the lighting or using additional lighting sources.
Related Products
We also offer other high - quality camera modules that you might be interested in. For example, the Industrial Autofocus Machine Vision USB Camera Module Hd Wide Fov is suitable for industrial applications that require high - resolution images and wide field - of - view. The IMX298 Auto Focus USB Camera Module provides excellent autofocus capabilities and is a great choice for various vision systems. And the OV5640 Autofocus is a reliable option with good performance and affordability.
Conclusion
Installing the Imx258 Camera Module is a relatively straightforward process if you follow the steps outlined above. By carefully preparing the installation environment, connecting the camera module correctly, and testing it properly, you can ensure that the camera module works smoothly and provides high - quality images and videos for your applications.
If you're interested in purchasing the Imx258 Camera Module or any of our other products, please feel free to contact us for more information and to start a procurement negotiation. We're committed to providing you with the best products and services to meet your needs.
References
- Camera Module Installation Guides from Manufacturer
- Technical Documentation of Imx258 Camera Module
- Operating System Documentation for Camera Configuration